Last updated November 17, 2026

Free written scope consultation - allowances, timeline, and change-order rules on paper before a single trade is scheduled
Driveway & Pavers Troubleshooting: Common Problems and How to Fix Them
Replacing sunken pavers without fixing the base is a repair that typically repeats itself within two rainy seasons. The symptom is visible at the surface, but the cause sits eight inches underground, in the aggregate layer nobody sees. Most driveway paver problems we’re called out to inspect in Santa Rosa trace back to one of four failures: base failure, edge restraint loss, polymeric sand washout, or efflorescence. Each has a different fix, a different cost, and a different urgency level. This guide teaches you to identify which one you actually have before you spend a dollar, using the same diagnostic steps our crews run on arrival.
Quick Answer
Most sunken, shifting, or cracking driveways are caused by a failed base layer, a lost edge restraint, washed-out joint sand, or cosmetic efflorescence, in roughly that order of frequency. A single sunken paver usually means localized base settlement; a whole zone sinking points to deeper base failure or poor drainage; pavers spreading sideways at the driveway edge mean the edge restraint has failed. Diagnose the pattern before repairing, because the fix ranges from a $15 acid wash to a $700 base correction.
Styles & brands we work with
- Kitchen remodeling
- Bathroom remodeling
- Home additions & ADU
- Roofing
- Windows & doors
- Driveway & pavers
- Fence
Table of Contents
- How to Diagnose Your Paver Problem in Five Minutes
- Probing the Base With a Rebar Rod Before You Pull Anything
- Base Failure: The Cause Eight Inches Underground
- Edge Restraint Loss and Lateral Spread
- Polymeric Sand Washout Versus Joint Erosion
- Efflorescence: The White Haze That Alarms Homeowners
- What Paver Repairs Actually Cost
- Common Mistakes to Avoid
- When to Call a Professional
How to Diagnose Your Paver Problem in Five Minutes
The pattern of the failure tells you the mechanism, and the mechanism tells you the fix. Before you lift a single paver, walk the surface and categorize what you’re seeing. We’ve found this three-way split holds up on nearly every driveway we inspect in Santa Rosa, from Bennett Valley to Rincon Valley.
- A single sunken paver. One stone sitting low, neighbors intact. This is localized settlement, usually from a void in the bedding layer or a stone that was never set to grade. The fix is a single-paver reset, and it’s the cheapest repair on this list.
- A sunken zone. Three or more pavers, or a whole patch, dropping together, often after heavy rain. This points to base failure underneath: insufficient compaction, a base layer that never drained, or soil movement. Resetting the surface without correcting the base repeats the failure.
- Widespread lateral spread. Pavers migrating sideways or opening wider gaps at the driveway edge. The field itself is fine; the edge restraint that holds the whole system in compression has failed. Look for a loose plastic or concrete edge, or turf creeping over the boundary.
Two more patterns to rule out. If you see white haze on the surface with no movement, that’s efflorescence, and it’s cosmetic. If joint sand is washing out and the pavers are loose only at the joints, you have a sand retention problem, not a base problem. For broader context on how these systems are built correctly in the first place, see our Driveway & Pavers in Santa Rosa service page.
Probing the Base With a Rebar Rod Before You Pull Anything
This is the step most homeowners skip, and it’s the one that saves you from tearing up sound sections unnecessarily. A 3/8-inch rebar rod, four feet long, pushed into the joint lines tells you the condition of the base without lifting a single stone.
- Choose three points: one in the suspect zone, one on sound pavers ten feet away as a control, and one at the driveway’s low point where water collects.
- Push the rod straight down through a joint line (not through the paver itself) with steady hand pressure, not a hammer.
- Note the resistance. Firm, uniform resistance for the full depth means the base is compacted. A sudden easy plunge means a void, loose aggregate, or saturated soil underneath.
- Pull the rod and look at what comes up. Dry, clean aggregate is healthy. Mud or wet, dark soil means water is sitting in the base, which is a drainage failure and the most common root cause we see on older Santa Rosa driveways.
If the rod goes down easy at all three points, you have a genuine base problem. If it’s firm in the suspect zone and the only issue is one low stone, you’re looking at a bedding-layer fix, and the base stays intact. That one test can mean the difference between a $60 DIY repair and a $700 excavation, so run it before you buy anything.
Base Failure: The Cause Eight Inches Underground
The base is a compacted layer of crushed aggregate, typically four to eight inches deep depending on traffic load, sitting under a one-inch bedding layer of sand. When that aggregate isn’t compacted to spec, or when water gets into it and can’t drain out, it consolidates under the weight of the driveway and the pavers settle. The surface is just reporting what happened below. In Santa Rosa’s clay-heavy soils and winter rain, poorly drained bases fail faster than in drier climates, which is why we probe for moisture first.
A proper base correction follows a sequence that leaves nothing to chance:
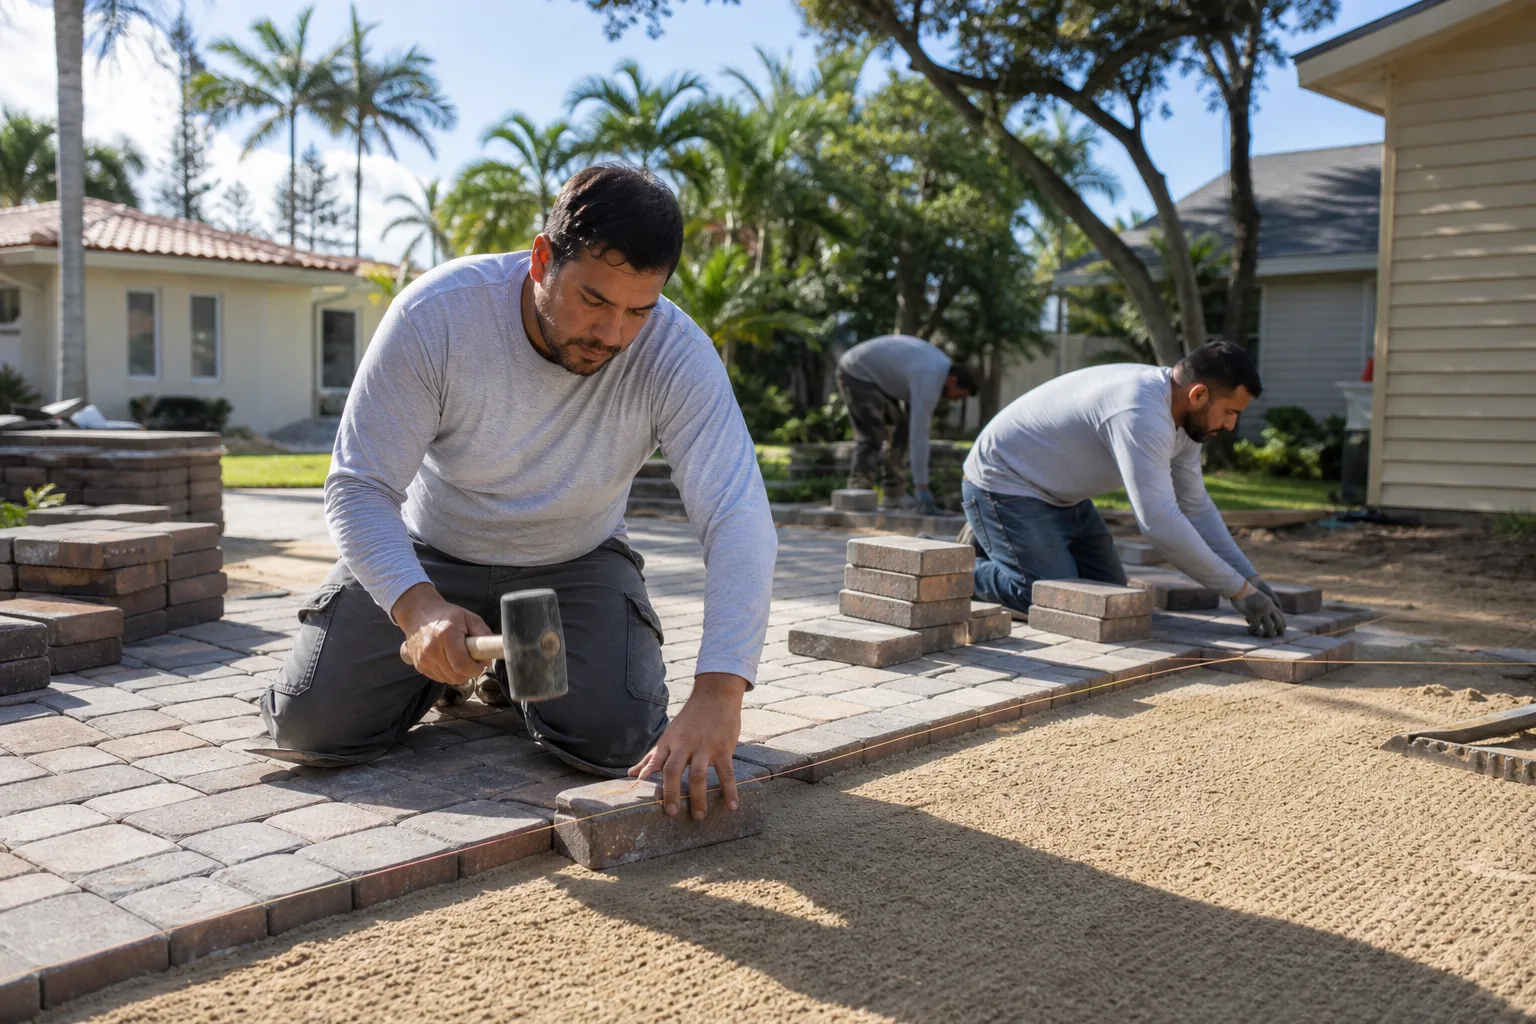
- Lift the affected pavers and set them aside on a tarp, sorted so they go back in the same orientation.
- Excavate the failed base down to stable, compacted subgrade, typically six to eight inches below finished grade for a residential driveway.
- Reinstall crushed aggregate in lifts of two to three inches, compacting each lift with a plate compactor before the next goes down. One thick lift never compacts fully.
- Confirm slope away from the house at roughly 1 to 2 percent so water runs off rather than into the base.
- Re-lay the bedding sand, reset the pavers to grade, and re-sand the joints.
Skipping step three is where DIY base repairs fail. Without real compaction, the aggregate settles again in the first wet season and you’re back where you started. We source base aggregate from brands like Quikrete for consistency, because uniform gradation compacts predictably.
Edge Restraint Loss and Lateral Spread
Pavers are held in place by compression, a tight field locked in by an edge restraint running the full perimeter. That restraint is usually a plastic or aluminum edge spiked into the base, or a concrete curb. When it fails, the field opens up, joints widen, and pavers migrate sideways toward the road or lawn. We see this most often at driveway aprons where a plastic edge has cracked or pulled its spikes during freeze-thaw cycles or from vehicle loading.
The failure is easy to spot. Stand at the driveway edge and press down on a paver near the boundary. If it rocks or moves outward, the restraint isn’t doing its job. On a sound driveway, the edge pavers won’t move at all.
Repairing edge restraint loss means re-establishing that boundary. That’s typically spiking a new edge restraint through the base, or in severe cases pouring a concrete curb, then re-tightening the field by re-sanding joints and re-compacting. This is one failure where the fix is mostly labor, not material, so the number on the quote reflects time more than product. If the driveway meets a fence line or lawn, an unstable edge can also let turf and roots creep in. Our Fence Installation in Santa Rosa page covers how boundary structures and hardscape edges get coordinated so neither undermines the other.
Polymeric Sand Washout Versus Joint Erosion
Joint sand keeps pavers locked and stops water from running straight into the base. When it’s gone, joints open, pavers shift, and weeds move in. But not all sand loss is the same. Polymeric sand washout means the stabilized sand has physically left the joint, usually leaving a visible channel. Joint erosion means the sand is still there but has broken down or been displaced locally, often from a hose spray or heavy runoff. Both look similar from above; the fix is similar too, and the key is using the right product.
Garden-variety bagged sand fails within one season because it has no binder. The correct product for re-sanding a residential paver driveway is a stabilized polymeric joint sand, such as Techniseal HP+, applied to a clean, dry joint and activated with a light water mist per the manufacturer’s instructions. The polymer cures the sand into a flexible, water-resistant joint that holds for years. A proper re-sand runs a cost most homeowners can justify because it’s the single most effective preventive step against future base damage: water that can’t enter the joints can’t reach the base.
A re-sand is a half-day job for a trained crew on a standard driveway. The steps are: clean out the old sand and weeds, blow the joints dry, sweep in the new polymeric sand to slightly below the chamfer, mist to activate, and let it cure without traffic for the manufacturer’s stated window.
Efflorescence: The White Haze That Alarms Homeowners
Efflorescence is a white, powdery mineral deposit that rises to the surface of concrete pavers as water evaporates out. It looks alarming and gets reported to us as “the pavers are failing.” It isn’t. Efflorescence is cosmetic, it doesn’t affect structural integrity, and it resolves with a simple acid wash. We document it as cosmetic versus structural on every visit precisely because it gets confused with real damage so often, particularly on new pavers in their first wet season.
To tell the two apart: efflorescence is a surface haze that wipes away with a dry brush and returns. Structural damage shows as cracked, chipped, or clearly moving pavers and doesn’t wipe away. If yours is the haze, here’s the standard fix:
- Wait for a dry stretch of weather and a fully dry surface.
- Mix a mild acid wash (a diluted muriatic or proprietary efflorescence remover) per the product’s instructions.
- Apply to a small test area first, scrub lightly with a stiff brush, and rinse thoroughly with clean water.
- Let it dry, inspect, and repeat only if needed. A second light pass usually clears a stubborn haze.
The materials run about $15 at any hardware store. The rest is patience and a scrub brush. If you’d rather not handle acid yourself, a contractor can do the wash for a modest service call. The important thing is knowing it’s cosmetic, so you don’t sign up for a full driveway replacement over a haze that rinses off.
What Paver Repairs Actually Cost
The cost benchmarks below are ranges, not quotes, but they tell you when to do it yourself and when to call. For a 20-square-foot sunken zone:
- DIY single-paver or small-zone reset with base correction: roughly $60 – $90 in materials (aggregate, sand, edge product, transport), plus your own labor and tool rental if you need a plate compactor.
- Contractor reset with base correction on the same 20-square-foot zone: roughly $400 – $700, including excavation, re-compaction in lifts, re-lay, and re-sand.
- Full polymeric re-sand on a standard two-car driveway: a labor-driven number; the material is inexpensive, the value is in the clean joints and activation.
- Edge restraint repair: tends to price on labor and access more than material.
- Acid-wash efflorescence treatment: about $15 in materials if DIY, or a modest contractor service call.
The rule of thumb: if the probe test shows a void or wet base, the DIY number doesn’t include the real fix, because you can’t properly re-compact a base without the right equipment and a wide enough excavation. That’s when the contractor number is the honest number. For the kind of documentation to expect with any written quote, including a flat price before work starts, our Rowan Construction Group Santa Rosa home page describes the standard we apply across all seven trades.
Common Mistakes to Avoid
- Resetting pavers on the old base. Levelling a sunken paver back over failed base repeats the failure in the next wet season. If the probe shows a void, correct the base or don’t touch it.
- Using garden sand in the joints. Ordinary bagged sand has no binder and washes out fast. Use a stabilized polymeric sand such as Techniseal HP+ if you want the repair to hold.
- Skipping compaction lifts. Dumping six inches of aggregate in one go and tamping the top compacts only the top inch. Real compaction happens in two-to-three-inch lifts, every one.
- Ignoring the edge. A driveway with a cracked or loose edge restraint will keep opening up no matter how many times you re-sand. Fix the boundary and the field stays tight.
- Acid-washing cracks. Efflorescence remover won’t fix a structural crack, and aggressive acid on damaged pavers worsens the surface. Identify the problem before applying anything.
- Repairing pavers over a drainage problem. If water pools on the driveway, the slope or drainage is wrong. Fixing the pavers over standing water means buying the same repair twice.
- Armchair-diagnosing from the surface. In our experience, the visible symptom is often one pattern away from the actual failure. Five minutes with a rebar rod prevents the most expensive mistake of all.
See the difference
 Before
 After
 Before
 After
 Before
 After
When to Call a Professional
Call a professional when the rebar probe shows a void or wet soil under the suspect zone, when pavers are spreading more than a quarter inch at the driveway edge, when the sunken area is larger than a few square feet, or when water pools on the surface after rain. These are the cases where the fix lives underground and a DIY surface repair won’t hold through a Santa Rosa winter. Rowan Construction Group Santa Rosa offers free estimates in Santa Rosa, with a flat written price and a written scope before anyone picks up a tool. Under The Haven Standard, no work proceeds on a change until the change order is signed, so the number you agree to is the number you pay. Call (833) 842-1866 to schedule your free estimate.
Frequently Asked Questions
Sinking pavers in Santa Rosa usually mean base failure: the compacted aggregate layer under the pavers has lost density from poor compaction or water intrusion, often in the region’s clay soils and winter rain. A single sunken paver points to localized bedding settlement, while a whole zone dropping together points to the base. Probe with a 3/8-inch rebar rod to confirm before repairing. Call (833) 842-1866 for a free estimate if the probe finds a void.
A DIY reset of a 20-square-foot sunken zone runs roughly $60 – $90 in materials, while a contractor reset with base correction on the same area runs roughly $400 – $700. The gap is excavation, re-compaction in proper lifts, and re-sanding. If your probe shows a void or wet base, the contractor number is the honest one. Call (833) 842-1866 for an exact quote, with a written price before any work starts.
The white haze is efflorescence, a cosmetic mineral deposit, not structural damage. It wipes away with a dry brush and returns until a mild acid wash clears it, at about $15 in materials if you do it yourself. If the pavers are also cracked or moving, that’s a different issue and worth a professional look. Call (833) 842-1866 and we’ll document what we find either way.
Polymeric sand washout means the stabilized sand has left the joint entirely, leaving a visible channel, while joint erosion means the sand is still in place but broken down or locally displaced. Both call for a full re-sand with a stabilized polymeric product such as Techniseal HP+, not garden sand, which fails within one season. A proper re-sand is a half-day job for a crew.
Minor repairs such as a re-sand, a single-paver reset, or an efflorescence wash typically don’t require a permit, while a full base excavation or a new driveway may trigger local requirements depending on the scope. We review the scope against local requirements before the written quote and pull permits where they apply, so the work is documented and inspections pass. Call (833) 842-1866 to talk through your project.
No. Rowan delivers a flat written price with a written scope before any work starts, and no work proceeds on a change until the change order is signed. That’s the discipline that has kept our projects within a few percent of the agreed cost across 4,000-plus jobs under The Haven Standard. Call (833) 842-1866 to schedule a free estimate, and bring any competitor’s written quote for a free second opinion reviewed line by line.
The Bottom Line
Paver failures aren’t all the same, and treating them that way wastes money. Diagnose the pattern first: a single sunken paver, a sunken zone, or lateral spread each point to a different mechanism. Probe the base with a rebar rod before lifting anything. Use stabilized polymeric sand, not garden sand. And know that efflorescence is a $15 cosmetic fix, not a driveway replacement. For anything underground, get a written price before work begins. For a free estimate in Santa Rosa, or a free second opinion on a competitor’s quote, call (833) 842-1866. If your project grows into a larger outdoor build, our Home Additions & ADU in Santa Rosa team coordinates the same documented process. For material sourcing, we work with brands like Quikrete and Sakrete for consistent aggregate compaction, and every visit includes a documented photo record as standard.
Written by the team at Rowan Construction Group Santa Rosa.