Last updated November 17, 2026








Free written scope consultation - allowances, timeline, and change-order rules on paper before a single trade is scheduled
Bathroom Remodeling Maintenance Schedule: What to Do and When
Schluter Systems rates its tile-edge trim for 25-plus years. The caulk joint a few inches away in the same shower usually needs attention by year two. That gap between the marketing number and the real-world number is where most remodels quietly fall apart, and it has nothing to do with how much you spent on tile. In our experience across Santa Rosa bathrooms, premature failures trace back to skipped caulk inspections and ignored grout, not defective products. This guide lays out a month-by-month, task-specific schedule tied to the actual service life of common finishes, including the intervals Santa Rosa’s hard water makes non-negotiable.
Quick Answer
A bathroom remodel needs a 30-day check of drains and caulk, a 6-month deep clean of fixtures and grout, annual re-caulking of wet joints, and re-sealing grout every 2 to 3 years. Santa Rosa’s hard water, which runs roughly 15 grains per gallon in some zones, shortens the intervals on shower heads, aerators, and glass, so plan on descaling more often than the manufacturer assumes.
Styles & brands we work with
- Kitchen remodeling
- Bathroom remodeling
- Home additions & ADU
- Roofing
- Windows & doors
- Driveway & pavers
- Fence
Table of Contents
- Why a Maintenance Schedule Matters More Than the Materials
- The First 30 Days After Your Remodel
- The 6-Month Check: Fixtures, Grout, and Glass
- The Annual Re-Caulk: Where and How
- Re-Sealing Grout Every 2 to 3 Years
- How Santa Rosa Hard Water Changes the Calendar
- The Physical Inspection Checklist: Healthy vs. Failing Caulk
- Which Skipped Tasks Void Manufacturer Warranties
Why a Maintenance Schedule Matters More Than the Materials
The lifespan of a bathroom is set less by what gets installed and more by what happens after the crew leaves. A $14 tube of sealant applied on schedule protects a $4,000 tile shower. Skipped, that same joint lets water wick behind the tile, and the repair bill moves into four figures. The materials are usually fine. The maintenance is what fails.
Manufacturers design their products assuming a certain level of care, and their warranties say so in writing. Kohler, for example, ties its fixture finish warranty to documented care requirements: mild soap and water, no abrasive cleaners, no scouring pads. A finish that pits because it was scrubbed with an abrasive pad is a finish the warranty won’t cover. The same logic applies to grout sealers and caulk joints. The product was rated for a service life; the service life assumes the maintenance happened.
In Santa Rosa, this matters more than in a dry climate. The North Bay’s wet winters push indoor humidity up for months, and showers here stay damp longer than they do in drier parts of California. That moisture is what feeds mildew in caulk lines and what slowly breaks down a sealer’s bond. A schedule built for a desert bathroom will under-serve a Santa Rosa one. Build the calendar around what the coast actually does.
The First 30 Days After Your Remodel
The first month is about catching early settling, not deep maintenance. New caulk and new grout cure and shrink slightly, and the first hot showers stress the joints. A 30-day walkthrough catches the small issues before they become water intrusion.
- Clean the drain hair trap. Pull the stopper or hair trap and clear it. This is a five-minute task and the single highest-value monthly habit in any bathroom. Hair and soap scum are the leading cause of slow drains, and a slow drain is a standing-water problem that stresses everything downstream.
- Inspect every caulk joint. Run a finger along the tub-to-tile line, the shower corners, and the sink backsplash. Look for gaps, lifting edges, or discoloration. New caulk that has pulled away in the first month usually means the joint moved or the surface wasn’t clean when it was applied. Note it and call the installer if it’s failing this early.
- Check the toilet base. Press gently on the floor around the toilet. Any rocking or soft spot is a sign of a loose wax ring or a floor issue. Water at the base is a stop-and-call situation, not a wait-and-see.
- Test the exhaust fan. Hold a tissue to the grille while the fan runs. If it doesn’t hold, the fan isn’t moving enough air to clear shower humidity. A weak fan is a long-term mold problem in Santa Rosa’s damp months.
- Wipe down new fixtures. A quick pass with mild soap and water after each shower keeps hard-water minerals from bonding to the finish while it’s still new.
None of this requires tools beyond a flashlight and a tissue. The point is to catch the small failures while the 365-Day Done Right Promise still covers them, rather than discovering them in year three when the fix is on you.
The 6-Month Check: Fixtures, Grout, and Glass
Twice a year, the bathroom gets a real going-over. This is where Santa Rosa’s hard water starts to show. Minerals bond to shower heads, faucet aerators, and glass doors, and once they cure they’re much harder to remove.
- Descale the shower head. Unscrew it, soak it in white vinegar for an hour, and rinse. Hard water leaves calcium deposits that clog the nozzles and cut water pressure. In a 15-grain zone, this is a six-month task, not an annual one.
- Clean the faucet aerators. Unscrew the aerator tip, rinse out the mineral grit, and reinstall. A clogged aerator is why a faucet that ran fine at installation starts spraying sideways.
- Deep-clean the grout. Scrub grout lines with a soft brush and a pH-neutral cleaner. Skip the bleach and the acidic tile cleaners: both break down sealers and grout over time. A neutral cleaner lifts soap scum without eating the finish.
- Check the glass shower door seals. The sweep at the bottom of a glass door is a wear item. If it’s cracked or stiff, water escapes onto the floor. Replacements are inexpensive and take minutes.
- Look at the ceiling above the shower. Paint peeling or bubbling there is a sign the fan isn’t keeping up, or that a roof leak is finding its way down. In Santa Rosa’s rainy season, that second possibility deserves a look.
Six months is also a good checkpoint to test the grout sealer. Drip a few drops of water on the grout in the shower floor. If the water beads, the sealer is holding. If it soaks in and darkens the grout, it’s time to re-seal.
The Annual Re-Caulk: Where and How
Once a year, re-caulk the wet joints. This is the task that protects the tile assembly, and it’s the one most homeowners skip until they see water damage. In our experience, the caulk joint is the first thing to fail in a Santa Rosa shower, usually within 18 to 24 months if it isn’t maintained.
Use a quality sealant rated for wet areas. DAP 3.0 is a common choice; it’s a siliconized acrylic that adheres well to tile and stays flexible. For a shower that sees daily use, a 100% silicone in a matching color is the more durable option, though it’s less forgiving to apply. Either way, the prep matters more than the product.
- Remove the old caulk completely. Use a caulk removal tool or a plastic scraper. Get all of it, including the residue in the corners. New caulk over old caulk fails fast.
- Clean and dry the joint. Wipe with a mild cleaner, then let it dry fully. Caulk won’t bond to a damp surface.
- Apply a consistent bead. Cut the nozzle at a 45-degree angle and push the bead along the joint. A smooth, continuous line with no gaps is the goal.
- Tool the joint. Run a wet finger or a caulk tool along the bead to press it into the corner and smooth the surface.
- Let it cure. Follow the tube’s cure time, usually 24 hours, before the shower goes back into use. Skipping this step is why new caulk fails in weeks.
One tube of DAP 3.0 covers most of a standard shower. Keep a spare on the shelf. When you spot a failing joint mid-year, you want to fix it that weekend, not wait for a store run.
Re-Sealing Grout Every 2 to 3 Years
Grout sealer is a sacrificial layer. It wears down with cleaning and foot traffic, and when it’s gone, the grout starts absorbing water. Re-seal every 2 to 3 years in a shower, and every 3 to 5 years on a bathroom floor. In Santa Rosa’s hard-water zones, lean toward the shorter end of that range.
Aqua Mix Sealer’s Choice Gold is a common solvent-based penetrating sealer that works on both cementitious and epoxy grout. It penetrates rather than coating, so it doesn’t leave a film, and it holds up well in a wet environment. A quart covers roughly 75 to 150 square feet, which is more than enough for a standard bathroom floor and shower.
The process is simple but takes a day of drying time. Clean the grout thoroughly first, let it dry completely (24 to 48 hours), apply the sealer with a small brush or applicator, let it soak in for the time on the label, then wipe off the excess before it dries on the tile surface. Cure time varies by product; most need 24 to 72 hours before the area gets wet. Do this in a dry stretch, not during a Santa Rosa rain week when indoor humidity is high and drying takes longer.
If you’re re-sealing because the grout has started to crumble or crack, that’s a different problem. Crumbling grout means water has been getting behind it, and the fix is re-grouting, not re-sealing. Call a professional before you seal over a failure.
How Santa Rosa Hard Water Changes the Calendar
Santa Rosa water runs hard. Some zones measure around 15 grains per gallon, which is well above the national average and enough to change every interval in this guide. Hard water is water with dissolved calcium and magnesium, and those minerals bond to surfaces as scale. Scale on a shower head clogs the nozzles. Scale on a faucet aerator cuts flow. Scale on glass doors etches the surface over time and is nearly impossible to remove once it cures.
What this means in practice: descale the shower head every six months instead of annually. Clean the aerators at the same time. Squeegee the glass door after every shower, or at minimum a few times a week, because the minerals in Santa Rosa water bond fast. In a soft-water city, a monthly glass clean is enough; here, weekly is closer to what the water demands.
The grout sealer also takes more abuse. Hard water minerals work into the grout surface and break down the sealer’s bond, so the 2-to-3-year re-seal window in this guide assumes regular cleaning. If you skip the cleaning, re-seal every two years. If you have a water softener on the house, you can stretch the intervals back out. A softener is the single most effective thing a Santa Rosa homeowner can add to reduce bathroom maintenance, and it pays for itself in fixture life.
The Physical Inspection Checklist: Healthy vs. Failing Caulk
You don’t need a moisture meter to inspect a caulk joint. You need a flashlight and five minutes. Here’s what to look for, and what each sign means.
- Healthy caulk: a smooth, continuous bead with an unbroken seal at both edges. It should feel flexible when pressed and show no discoloration along the joint line.
- Caulk that’s about to fail: a small gap or curl at one edge, usually in a corner. This is the early warning. Re-caulk now, before water gets behind the tile.
- Caulk that’s already failing: visible mold or mildew in the bead, a section that has pulled away, or a spongy feel when pressed. Water is likely already getting in. Stop using the shower and call a contractor.
- Grout to watch: hairline cracks in a line, or grout that has started to crumble at the edge of a tile. Cracks mean movement; crumbling means water. Both need attention.
- Soft spots: a spongy floor near the toilet or tub, or a baseboard that’s swollen. This is a water-intrusion problem behind the surface, and it’s a call-a-professional situation.
Check the joints after a shower, when the bathroom is at its dampest. A joint that looks fine when dry can open up under the heat and moisture of a real shower. And check the corners, not just the long straight runs. Corners are where caulk fails first.
Which Skipped Tasks Void Manufacturer Warranties
Warranties are written around maintenance requirements, and the manufacturer will ask what care the product received. Skip the care, and the warranty may not apply. Here’s where the risk is highest.
- Fixture finishes. Kohler’s finish warranty documents required care: mild soap and water, no abrasive cleaners. Use a scouring pad on a Kohler faucet and pit the finish, and the finish warranty is unlikely to cover it. The same applies to most brushed and polished finishes.
- Grout sealers. Sealer warranties assume the sealer was reapplied at the manufacturer’s interval. A sealer that was never renewed isn’t a defective sealer.
- Caulk and sealant. Most caulk warranties exclude joints that show lack of maintenance or improper application. A joint that failed because it was never inspected isn’t a product failure.
- Exhaust fans. Fan warranties often assume the fan is cleaned and the ductwork isn’t blocked. A fan clogged with lint and dust is a fan that will fail early.
This is where a documented record earns its keep. Our crews leave a photo record on every visit showing what was found and what was done. If a finish fails and you have a dated record of the care it received, the warranty conversation is short. Keep your own log too: the date of each re-caulk, each re-seal, each descale. A simple note on your phone is enough.
Common Mistakes to Avoid
- Waiting for visible water damage. By the time you see a stain on the ceiling below, water has been getting in for months. Caulk failures show up as small gaps first. Inspect, don’t wait.
- Using abrasive cleaners on fixtures. Scouring pads and abrasive powders scratch the finish and can void a Kohler finish warranty. Mild soap and water is what the care instructions ask for.
- Caulking over old caulk. New sealant over a failing bead fails fast. Remove, clean, dry, then re-caulk. This is the most common shortcut we see in Santa Rosa bathrooms.
- Skipping the exhaust fan check. A weak fan in a Santa Rosa wet winter means months of trapped humidity. Check it twice a year with the tissue test.
- Sealing grout over a failure. Sealer won’t fix crumbling or cracked grout. It seals a sound surface; it doesn’t repair a broken one.
- Ignoring hard-water scale. Scale on glass and fixtures bonds with time. Descaling every six months in a 15-grain zone is far easier than removing cured scale later.
- Not keeping a record. Without dates, you can’t prove care, and warranty claims get harder. A phone note per task solves it.
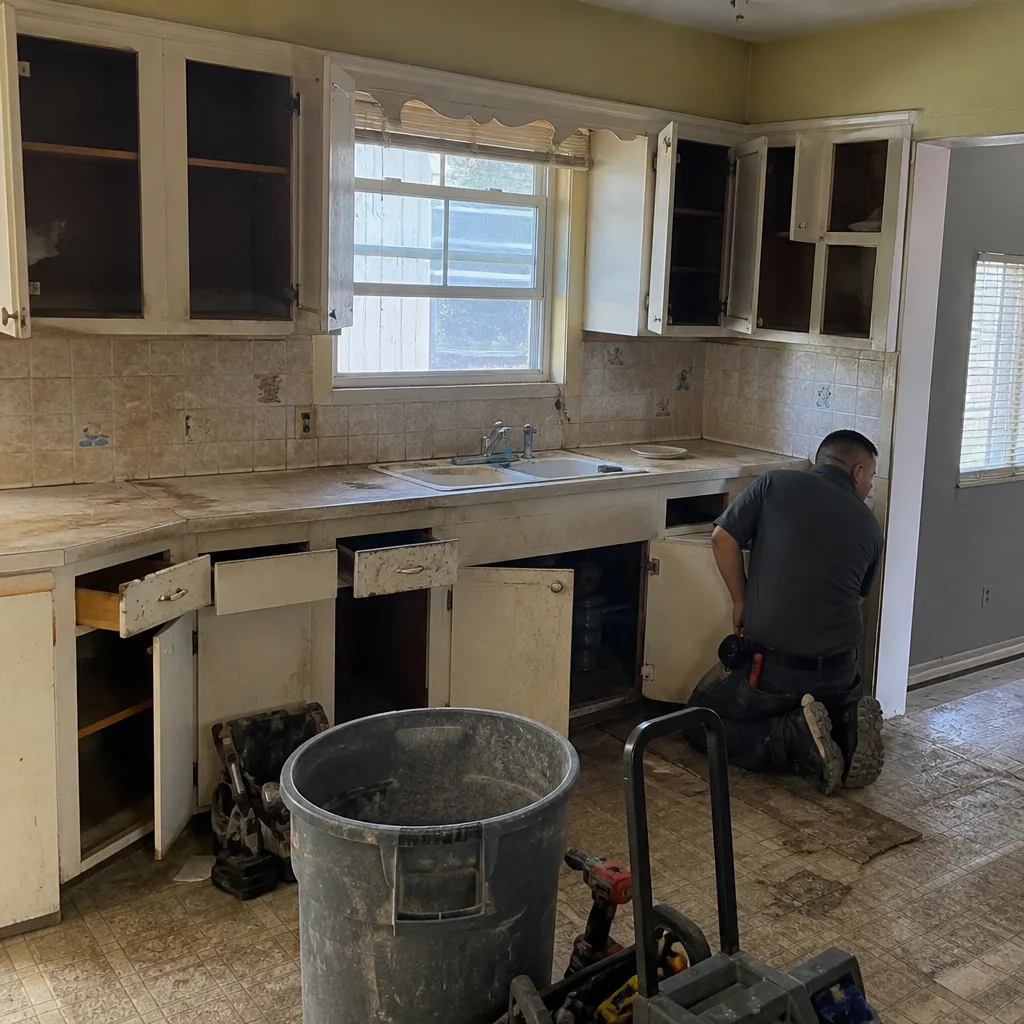
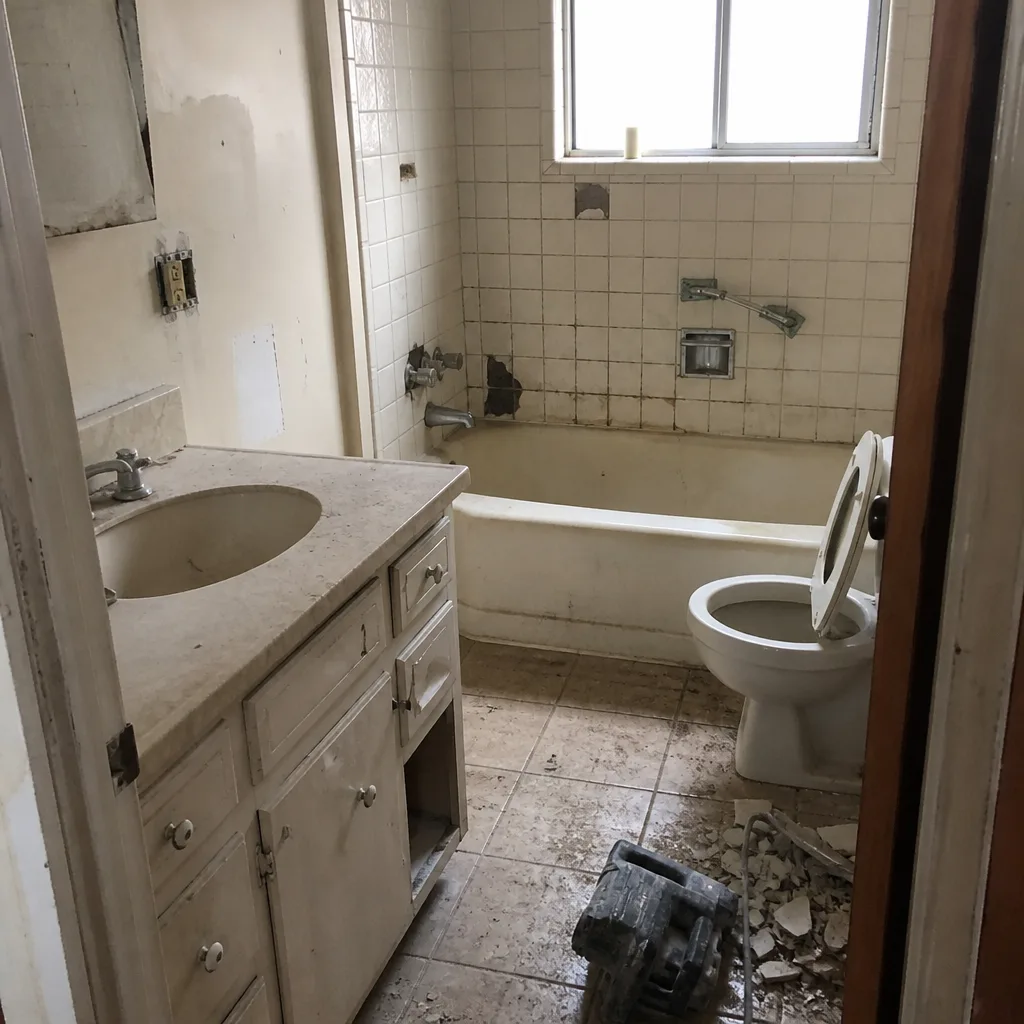
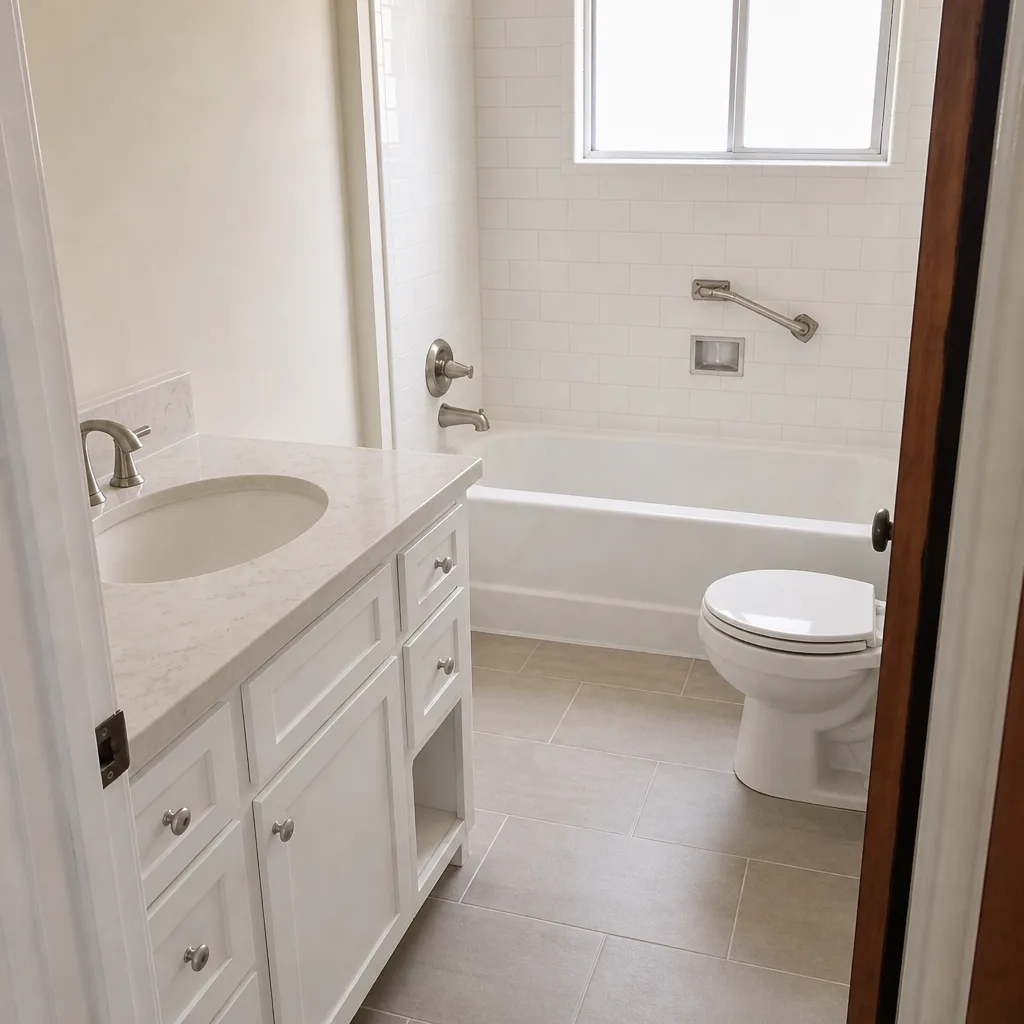
See the difference
 Before
 After
 Before
 After
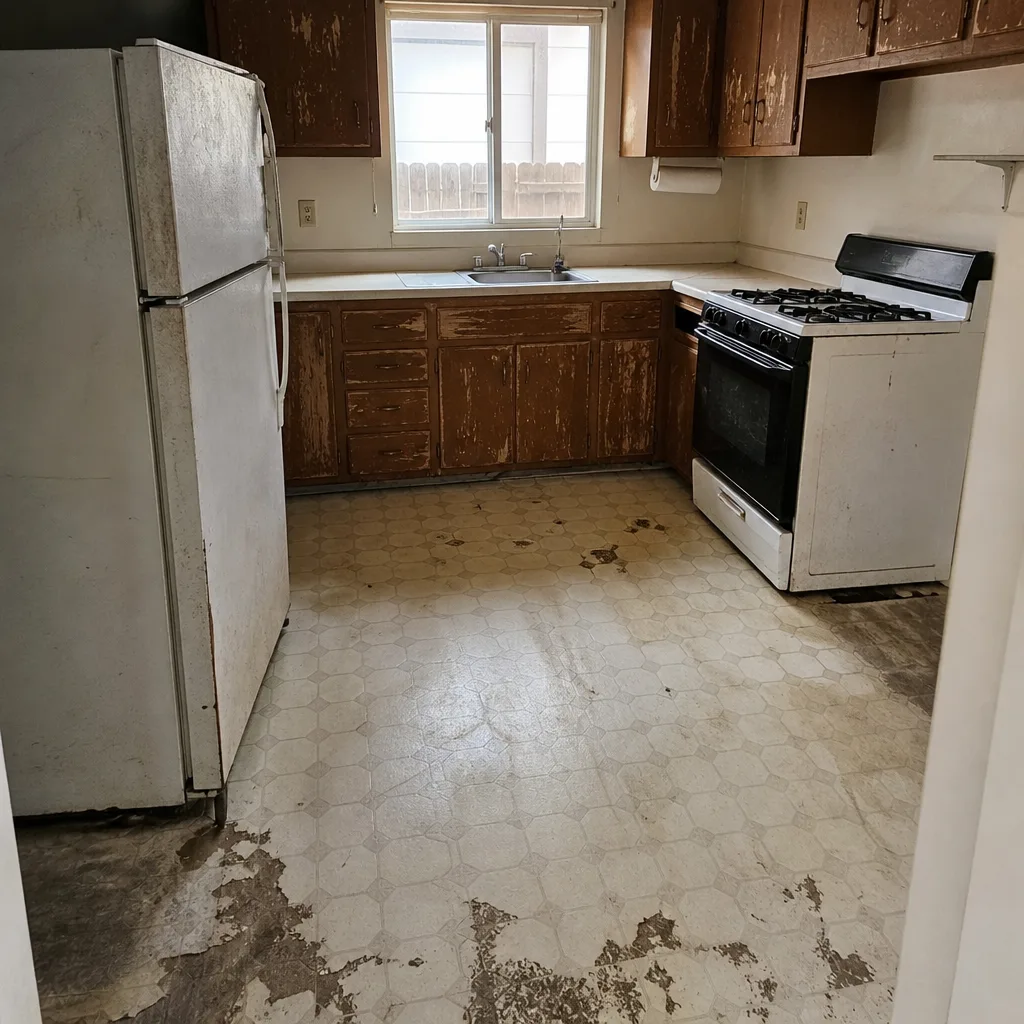 Before
 After
When to Call a Professional
Most of this schedule is owner-appropriate. Descaling a shower head, cleaning an aerator, re-caulking a joint: these are weekend tasks that cost under $200 in materials. The threshold matters. If a fix is under $200 in materials and you’re comfortable with it, do it. Once a repair moves past that, or involves opening a wall, replacing a valve, or re-grouting a shower floor, it’s a professional job.
Call when you find soft spots in the floor, water stains on the ceiling below, a shower that’s leaking behind the tile, or a toilet that rocks. Call when grout is crumbling rather than cracking. Call when the caulk failure keeps coming back in the same spot; that’s usually a movement or moisture problem behind the surface. Our technicians have up to 19 years of experience and will tell you what they found before they quote the fix. Rowan Construction Group Santa Rosa offers free estimates in Santa Rosa, with a written price before any work starts and a signed change order before any change proceeds. Call (833) 842-1866 to schedule yours.
For larger work that comes out of a maintenance finding, the same disciplines apply across our other trades. If a bathroom inspection turns up a failing exterior wall or a window that’s letting water in, that work ties into our Rowan Construction Group Santa Rosa home services, and a leaking roof above the bathroom is a roofing matter, not a caulk one. If the plan grows into a full bath addition or an ADU with a second bathroom, our Home Additions & ADU in Santa Rosa team handles the design and build. Hardscape and drainage issues that feed moisture into the house are covered by Driveway & Pavers in Santa Rosa, and yard drainage that sends water toward the foundation is a job for Fence Installation in Santa Rosa crews. Brandt, Belgard, and ActiveYards materials come up often on those exterior projects.
Frequently Asked Questions
Re-caulk the shower’s wet joints once a year, and inspect them every 30 days for the first month after a remodel. Santa Rosa’s damp winters and hard water shorten the interval. If a joint shows a gap or curl, re-caulk it immediately rather than waiting for the annual date. Call (833) 842-1866 if the same joint keeps failing; that points to a moisture or movement issue behind the surface.
Yes. Santa Rosa water runs around 15 grains per gallon in some zones, which is well above average. That means descaling shower heads and aerators every six months instead of annually, squeezing glass doors weekly, and re-sealing grout on the shorter end of the 2-to-3-year window. A whole-house water softener extends every one of those intervals and is the single best maintenance investment for a Santa Rosa bathroom.
Cleaning lifts soap scum and dirt off the surface with a soft brush and a pH-neutral cleaner. Sealing applies a penetrating layer that keeps water from soaking into the grout. You clean every few months and re-seal every 2 to 3 years in a shower. Aqua Mix Sealer’s Choice Gold is a common penetrating sealer, and a quart covers 75 to 150 square feet, enough for a standard bathroom.
It can. Kohler’s finish warranty documents required care: mild soap and water, no abrasive cleaners or scouring pads. A finish damaged by abrasive cleaning may not be covered. Sealer and caulk warranties also assume reapplication at the manufacturer’s interval. Keep a dated log of your maintenance, and the warranty conversation is straightforward.
Call when a repair moves past about $200 in materials, or when you find soft spots, water stains, a leaking shower, or a rocking toilet. Those are signs of water intrusion behind the surface, which is a professional job. Re-caulking a joint or descaling a shower head is owner work. Call (833) 842-1866 for a free estimate if you’re unsure which side of that line you’re on.
Yes, and the first 30 days matter most. New caulk and grout shrink slightly as they cure, and the first hot showers stress the joints. Do the 30-day walkthrough: clear the hair trap, inspect every caulk joint, check the toilet base, and test the exhaust fan. Catching early settling while the 365-Day Done Right Promise still covers it saves a much larger repair later.
The Bottom Line
A bathroom’s lifespan is written in its maintenance calendar, not its materials list. The Schluter trim will outlast the caulk joint by two decades, and the caulk joint is what protects the tile. Follow the schedule: 30-day inspection, 6-month descale and deep clean, annual re-caulk, re-seal grout every 2 to 3 years. In Santa Rosa, shorten every interval to account for hard water and damp winters. Keep a dated log, know the $200 threshold between owner work and a contractor call, and fix failures early. That discipline is what keeps a remodel standing for the life the products were rated for.
If a maintenance finding turns into a repair that needs a professional eye, call Rowan Construction Group Santa Rosa at (833) 842-1866 for a free estimate. Every project comes with a written price before work starts, a signed change order before any change, a documented photo record on every visit, and the 365-Day Done Right Promise behind it. Bring a competitor’s quote and we’ll review it line by line at no charge with our Free Second Opinion.
Written by the team at Rowan Construction Group Santa Rosa.