Last updated November 17, 2026





Free written scope consultation - allowances, timeline, and change-order rules on paper before a single trade is scheduled
Bathroom Remodeling Troubleshooting: Common Problems and How to Fix Them
Tile that cracks within 18 months of installation is almost never a tile problem. It’s a subfloor deflection problem that existed before the tile went down and should have been caught during demo. That single distinction tells a homeowner whether to pursue a warranty claim, split a repair cost, or accept the loss and move on. We’ve walked into hundreds of Santa Rosa bathrooms where the first complaint (“the grout is failing”) and the real cause (“the joists flex three-eighths of an inch underfoot”) were two different things entirely.
This guide sorts remodel failures into two piles: the ones that were knowable before demo and the ones that were genuinely discovered mid-project. A contractor who can’t tell you which pile a problem belongs in is a contractor to worry about. Here’s what the evidence looks like, what the fix costs, and how to build a paper trail that holds up.
Quick Answer
Most post-remodel bathroom failures trace to one of five causes: cracked grout from subfloor movement, mold at the caulk line from failed waterproofing (not bad caulk), low hot water pressure from a failing angle stop valve, exhaust fan condensation from a duct that slopes the wrong way or dumps into the attic, and a door that won’t close because the new tile raised the finished floor above the threshold clearance. Diagnosing which of these is contractor workmanship, material failure, or a pre-existing condition depends on the documentation the contractor produced before and during the job.
Styles & brands we work with
- Kitchen remodeling
- Bathroom remodeling
- Home additions & ADU
- Roofing
- Windows & doors
- Driveway & pavers
- Fence
Table of Contents
- Problems That Were Knowable Before Demo
- Problems Genuinely Discovered Mid-Project
- The Five Most Common Post-Remodel Failures, Diagnosed
- Tile Lippage: The ANSI Standard and Who Owns It
- The Inspection Failure Homeowners Never Anticipate
- What a Proper Change Order Looks Like
- Workmanship, Material Failure, or Pre-Existing: Sorting the Blame
Problems That Were Knowable Before Demo
Some problems are predictable from the first walkthrough, and that’s where accountability begins. Old drain lines in a Santa Rosa home built before 1970 are almost always cast iron or galvanized steel, both of which corrode from the inside and lose their interior diameter over decades. A contractor who opens a wall without inspecting the drain line before pricing the job has skipped a step. The same goes for subfloor condition: if the existing floor feels spongy near the toilet or shows staining at the flange, that’s a flag before demo starts.
Load-bearing walls are the third category. A contractor who doesn’t confirm which interior walls carry load before promising an open-concept layout is guessing. In Santa Rosa, many of the 1950s and 1960s ranch homes had a bearing wall running the length of the house, and a removal that looked simple on the marketing sketch becomes a beam install that adds $4,000 to $8,000. In our experience, the professional walkthrough catches most of this through probing the framing and observing water staining, and the honest contractor prices it up front rather than discovering it on day four.
Other knowable problems: age of the electrical wiring (knob-and-tube in a Santa Rosa pre-war home requires rewiring before it passes), the condition of the vent stack above the roofline, and whether the water heater has the capacity to serve a new shower body. These aren’t hidden; they’re checked.
Problems Genuinely Discovered Mid-Project
Some problems are only revealed once the toilet comes up. Subfloor rot under the flange is the classic example: the flange rusts, water seeps through the wax ring, and the plywood softens from the top down over years. You can’t see it until the toilet is out and the subfloor is exposed. A good contractor documents the rot with photos and measurements before proceeding, because the homeowner can’t verify something they didn’t see.
The other common mid-project discovery is a joist that’s been notched for plumbing in a previous renovation, weakening it beyond what was originally assumed. Both of these are genuinely discovered. Neither is the contractor’s fault, and neither is the homeowner’s. The difference between a good contractor and a bad one is entirely in the documentation: the good contractor stops, photographs the condition, writes a change order with the scope and the price, and doesn’t proceed until the homeowner has signed it. The bad contractor addresses it verbally and adds hours to the final invoice.
Under Section 1 of our Haven Standard, the price is written and signed before work begins, and no change proceeds until a written change order is countersigned. This is the protocol that keeps projects within a few percent of the agreed cost. For homeowners working with any contractor, the standard is: photograph, dimension, price, sign, then work.
The Five Most Common Post-Remodel Failures, Diagnosed
- Cracked grout. The cause is subfloor movement, and it is usually the wood, not the grout. Deflection greater than L/360 over the span allows the floor to flex, and grout doesn’t flex. The secondary cause is a grout joint narrower than the tile manufacturer specifies (usually 1/8 inch for rectified porcelain). A third, less common cause is a lack of movement joints at the perimeter, which is required by TCNA underlayment standards. The fix ranges from $300 to $900 for regrouting an affected area; the correct fix is more involved and starts with a deflection calculation.
- Mold at the caulk line. Everyone blames the caulk. It’s almost always a failed waterproofing membrane behind the tile. If the liquid-applied membrane (typically RedGard or a Schluter Kerdi sheet) was applied too thin, applied over a dusty substrate, or wasn’t applied at all behind the lower two courses, water gets behind the tile at the caulk seam and stays there. Replacing the caulk doesn’t fix it; the fix is demo from the wet wall down and correct waterproofing, typically $2,000 to $4,500 in the rear wall area.
- Low hot water pressure at the shower body. The cause is usually a failing angle stop valve (the shutoff under the sink or toilet) or an undersized supply line. Older 3/8-inch compression supply lines running to a 1/2-inch shower valve can’t deliver the flow. It’s rarely the water heater, no matter how old it is. A plumber verifies by pressure-testing at the valve inlet before touching the heater. The fix is typically $150 to $400 per valve.
- Exhaust fan condensation dripping. The duct run is sloped toward the exterior (correct) or toward the fan (incorrect) or terminates in the attic instead of through the roof or wall. Warm moist air inside a cool attic condenses in the duct, and it drips back through the fan grille. Meets code or it doesn’t; there’s no middle ground. The fix is rerouting the duct to a proper exterior termination, typically $200 to $600 depending on roofline access.
- Door that no longer closes. The new tile floor raised the finished floor height by a quarter inch or more, and the bottom of the door now hits the top of the tile or the sweep no longer clears. The tile installer isn’t responsible if the flooring height change was in the scope; the door installer isn’t responsible if the door was in the plan before tile was selected. Fix is a planing, rebate, or replacement, typically $80 to $500 depending on whether a hollow or solid-core door is involved.
Each of these gets misdiagnosed by the homeowner first. Knowing the real cause is the only thing that gets the fix right the first time. When our technicians show up, the first tool is usually a moisture meter, not a caulk gun.
Tile Lippage: The ANSI Standard and Who Owns It
Lippage is the height difference between the edges of two adjacent tiles. ANSI A108.02 allows a maximum of 1/32 inch of lippage for tiles with sides under 15 inches and 1/16 inch for tiles 15 inches and larger. That’s the standard the installer is measured against. If the finished floor exceeds those tolerances, it’s the installer’s responsibility, not a design quirk. If the floor meets tolerances and the homeowner still feels a heel-catch on the edge, the acceptance question is a preference, not a workmanship issue.
A few things drive lippage: tile warp (especially with larger-format porcelain), subfloor flatness (a floor that’s off 1/4 inch over 10 feet will produce lippage no matter what), and the installer’s notch-trowel technique (a flat trowel back-butter plus a properly sized notch trowel, usually 1/2 inch by 1/2 inch square-notch for large-format tiles). The right time to discuss lippage is before tile goes down: has the installer checked the tile for warp out of the box, and has the floor been flattened to within 1/8 inch over 10 feet per TCNA standard?
For a homeowner, the practical move is to run a straightedge across the finished floor before final payment. Any tile that rocks the straightedge is a warranty conversation. Document it with a photo and the measurement, and send it in writing to the contractor. Under the Rowan 365-Day Done Right Promise, if a floor we installed exceeds the ANSI tolerance within a year, we make it right. That’s a written commitment, not a handshake.
The Inspection Failure Homeowners Never Anticipate
Rough plumbing inspection requires all drain connections to be visible and pressure-tested before walls close. The same applies to the rough electrical and rough framing inspections. A contractor who skips the rough inspection to save a day creates a defect that surfaces years later, usually during a resale inspection when the buyer’s inspector photographs open framing and finds no inspection sticker on the plumbing.
In Santa Rosa, the permit and inspection process is done through the city’s building department, and every rough inspection that gets skipped is a record gap. For a homeowner, the checklist is:
- Ask for the permit number before work begins. It should be posted on-site.
- Ask which inspections are scheduled: rough framing, rough plumbing, rough electrical, and final. All four, minimum, for a full remodel.
- Ask for a copy of the signed-off inspection card for each phase before walls close.
- If a contractor suggests skipping an inspection because “it’s a small job,” that conversation is the last one you have with that contractor.
The inspection that gets skipped most often is the rough plumbing. It’s the one that involves water, and it’s the one a resale inspector looks at first. Our hauling crew has watched more than one “small remodel” turn into a $4,000 to $9,000 redo because a rough inspection was signed off on paper but never physically occurred. The paper trail is the whole game.
If a new bathroom is part of a bigger plan for your home, the broader Rowan Construction Group Santa Rosa home page covers how the seven trades fit together and how the 365-Day Done Right Promise applies across each of them.
What a Proper Change Order Looks Like
A change order is the document that keeps mid-project surprises from becoming mid-project disputes. When a contractor finds subfloor rot under a toilet, the process should look like this, in order:
- Stop work. Nobody touches anything until the condition is documented.
- Photograph the condition. Close-up, mid-range, and an overall frame with a tape measure or a reference object in it.
- Measure. Dimensions in inches, thickness of affected material, extent of the damage (three joists? four square feet of plywood? six lineal feet of sill plate?).
- Describe the cause and the fix in plain language. “Subfloor rot, approximately 4 square feet, under the toilet flange; joist adjacent has water staining but is structurally sound; removal and replacement with 3/4-inch exterior-grade plywood and new toilet flange.”
- Price the change as a line item. Materials, labor, and time. A flat number, not a range. No “TBD” on the document.
- Write the adjusted scope. What changes about the schedule, what changes about the warranty.
- Get a signature from the homeowner before the work proceeds.
Under Clause 1 of the Haven Standard, the price on a change order is written before anyone starts the change work. The homeowner countersigns, and the original signed page goes in the job file and a copy goes to the homeowner. This is not paperwork for paperwork’s sake; it’s what makes it possible to finish within a few percent of the agreed cost. A homeowner should be suspicious of any contractor who says “we’ll figure it out at the end.”
Workmanship, Material Failure, or Pre-Existing: Sorting the Blame
Every post-remodel complaint resolves in one of three directions, and the evidence that distinguishes them is different for each. Getting the category right determines whether the homeowner is asking the contractor for a warranty fix, the manufacturer for a material warranty, or themselves for a repair bill.
- Workmanship. The defect is present in the pattern of installation, not in the material. Examples: grout joint width below spec, tile lippage beyond ANSI tolerance, waterproofing applied too thin, exhaust duct sloped the wrong direction. Evidence: photos of the installation during construction, measurements on the finished surface, and the manufacturer’s written installation spec (Schluter, RedGard, and Laticrete all publish theirs).
- Material failure. The defect is in the product and follows the pattern of the product batch. Examples: a run of tile with excessive warp, a caulk that fails to cure, an angle stop valve that leaks at the seal after 14 months. Evidence: the failing material isolated from the correct installations around it, the batch number or lot number, and the manufacturer’s own warranty documentation.
- Pre-existing condition. The defect was in the substrate or the framing before the remodel and wasn’t diagnosable without demo. Examples: subfloor rot under a flange, notched joists from a prior remodel, a drain line that was already partially clogged with scale. Evidence: the mid-project photos and dimensions the contractor took, the change order that documented the discovery, and the contractor’s documentation of what was found and what was done.
In Santa Rosa, we regularly see pre-existing conditions in homes built between 1945 and 1975, when cast-iron drain lines and 2-by-8 framing were standard. Neither is a defect; both require an honest conversation before demo.
Common Mistakes to Avoid
- Choosing a contractor on price alone. The lowest bid almost always hides a scope assumption: no waterproofing membrane, no rough inspection, no drain line replacement. The $6,000 difference up front is a $14,000 fix in year three.
- Skipping the pre-demo moisture check. A ten-dollar moisture meter reading at the toilet flange and the base of the shower wall takes two minutes and can catch subfloor rot before demo. In Santa Rosa’s wet-season climate, this matters more than in a dry inland market.
- Approving a verbal change order. Any change to the scope that isn’t signed in writing before the work starts becomes a dispute on the final invoice. If a contractor says “we’ll just add it to the end,” that’s the conversation to have in writing, not verbally.
- Accepting tile lippage as a design feature. ANSI A108.02 sets a specific tolerance. If a tile floor exceeds it, the homeowner has a workmanship claim within the warranty period, and the fix belongs to the installer, not the homeowner.
- Letting the ceiling be closed without a signed-off rough inspection on file. The “small remodel” that skipped a rough plumbing inspection is a documented gap at resale. Ask for the signed inspection card before the drywall goes back up.
- Ignoring the exhaust duct run. A fan duct that terminates in the attic (not through the roof or wall) is common in older construction. It’s also one of the top causes of attic mold, and the fix is usually a couple hundred dollars.
- Assuming every caulk failure is a caulk problem. Recaulking a shower seam three times in two years is the symptom, not the disease. The seam is failing because the waterproofing behind it has a gap, and caulk is the messenger.
If a bathroom remodel is part of a wider update, we also cover driveway, hardscape, and fencing in the same Seven-Trade framework: Driveway & Pavers in Santa Rosa, Fence Installation in Santa Rosa, and if the plan extends to an addition, Home Additions & ADU in Santa Rosa.
See the difference
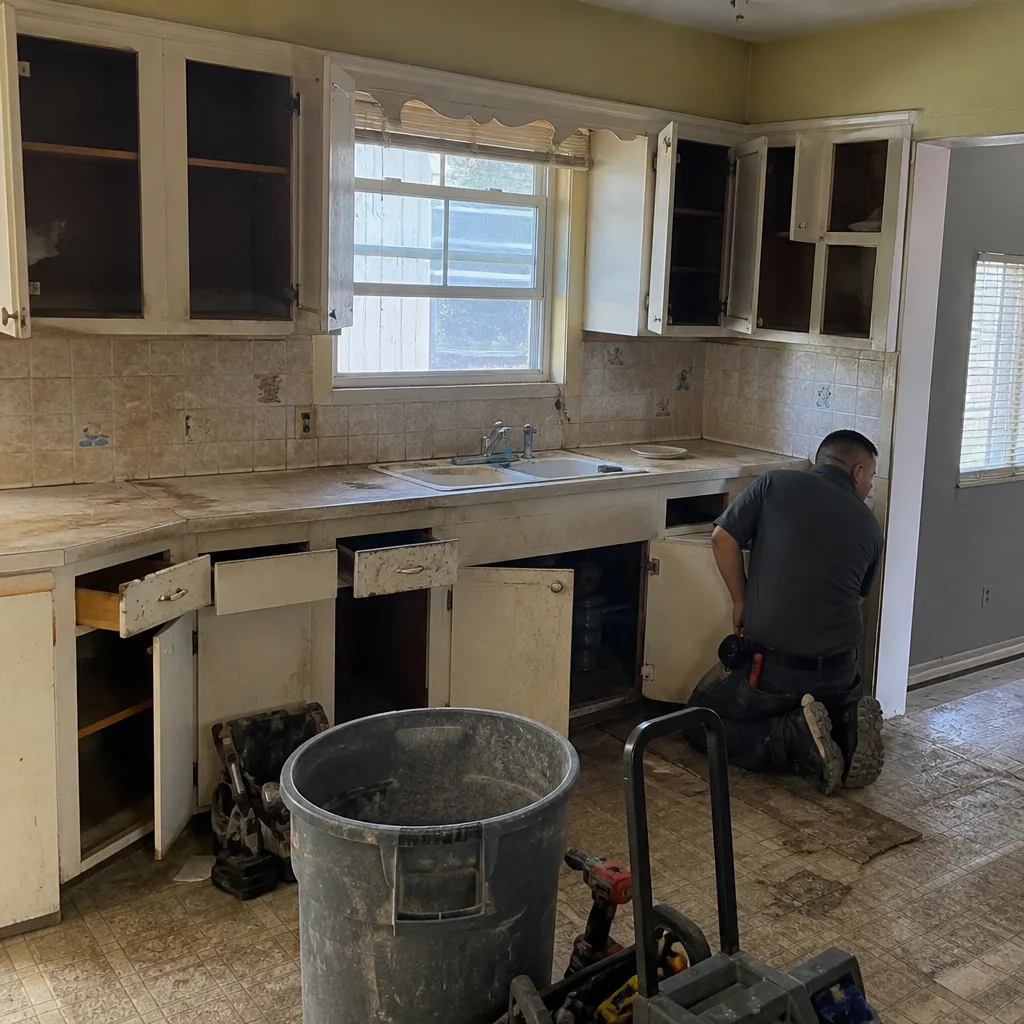 Before
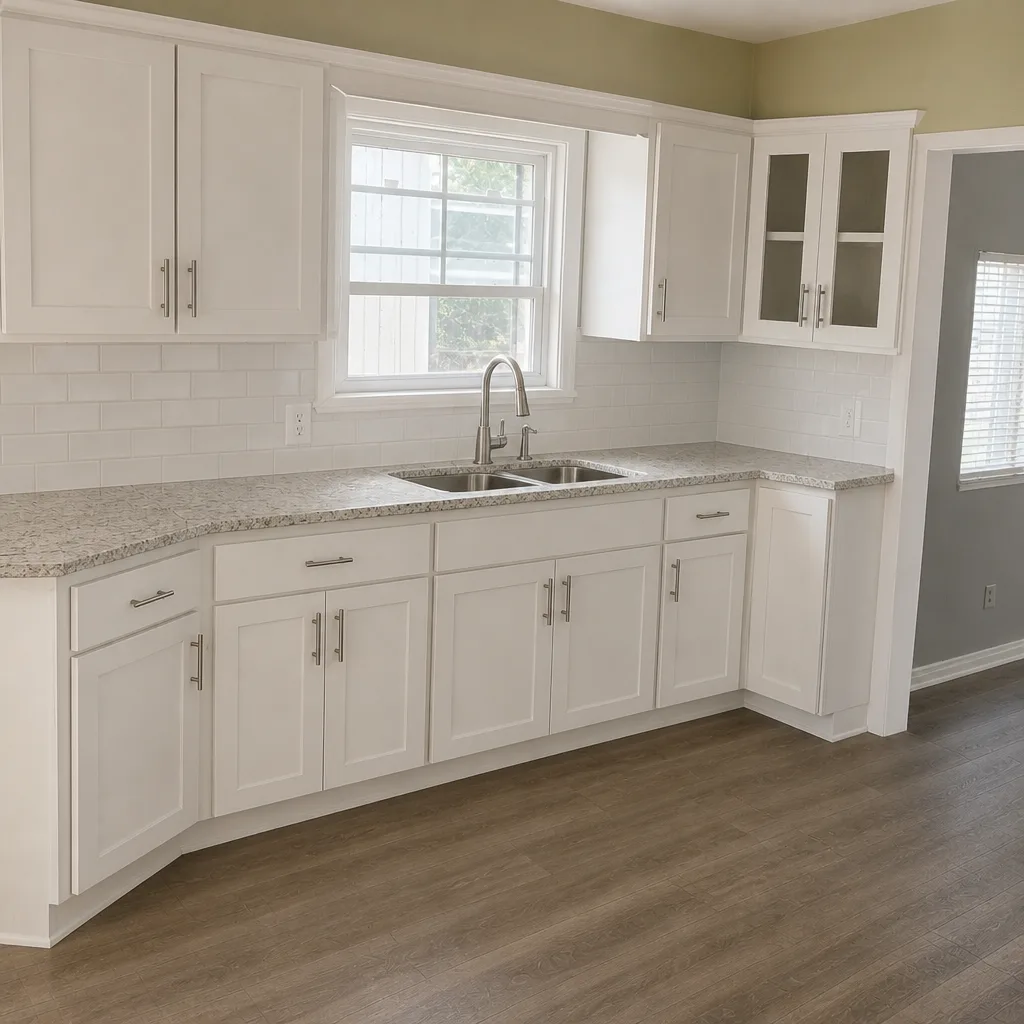 After
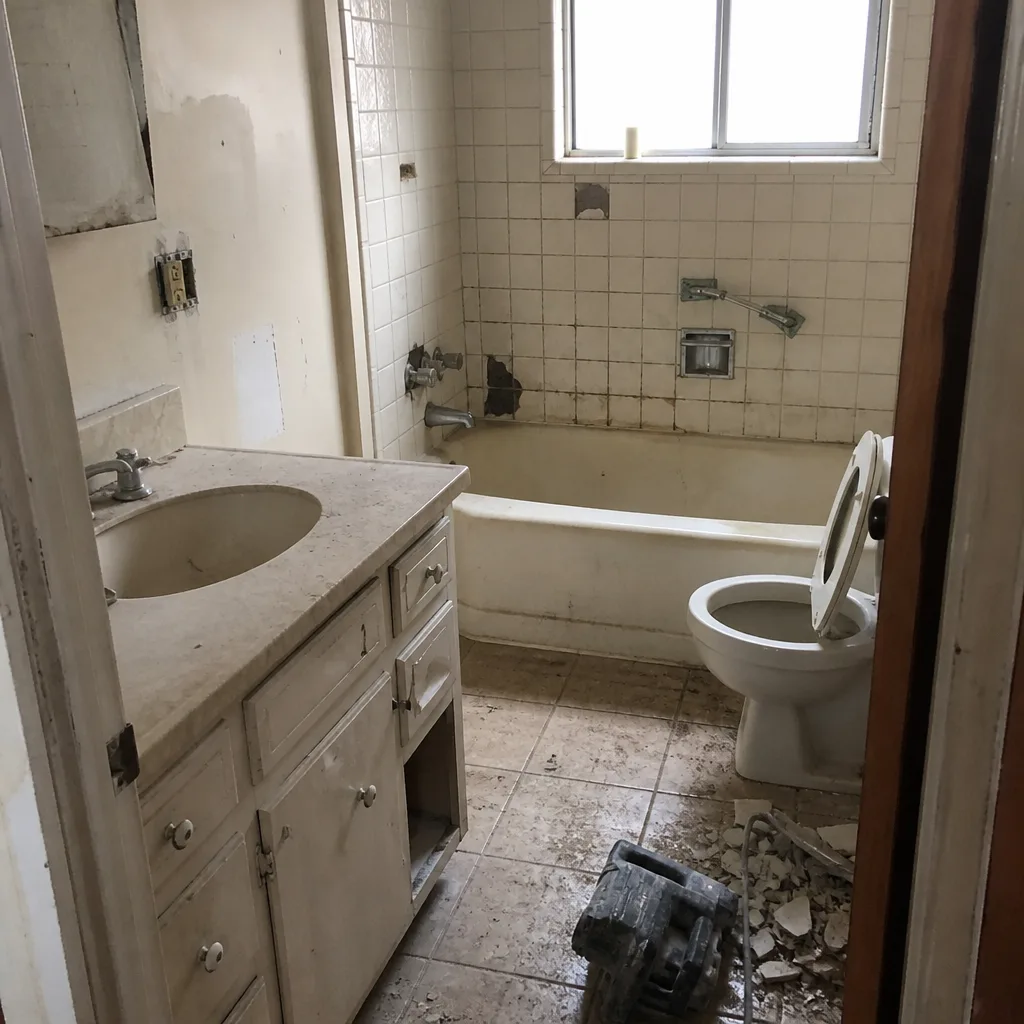 Before
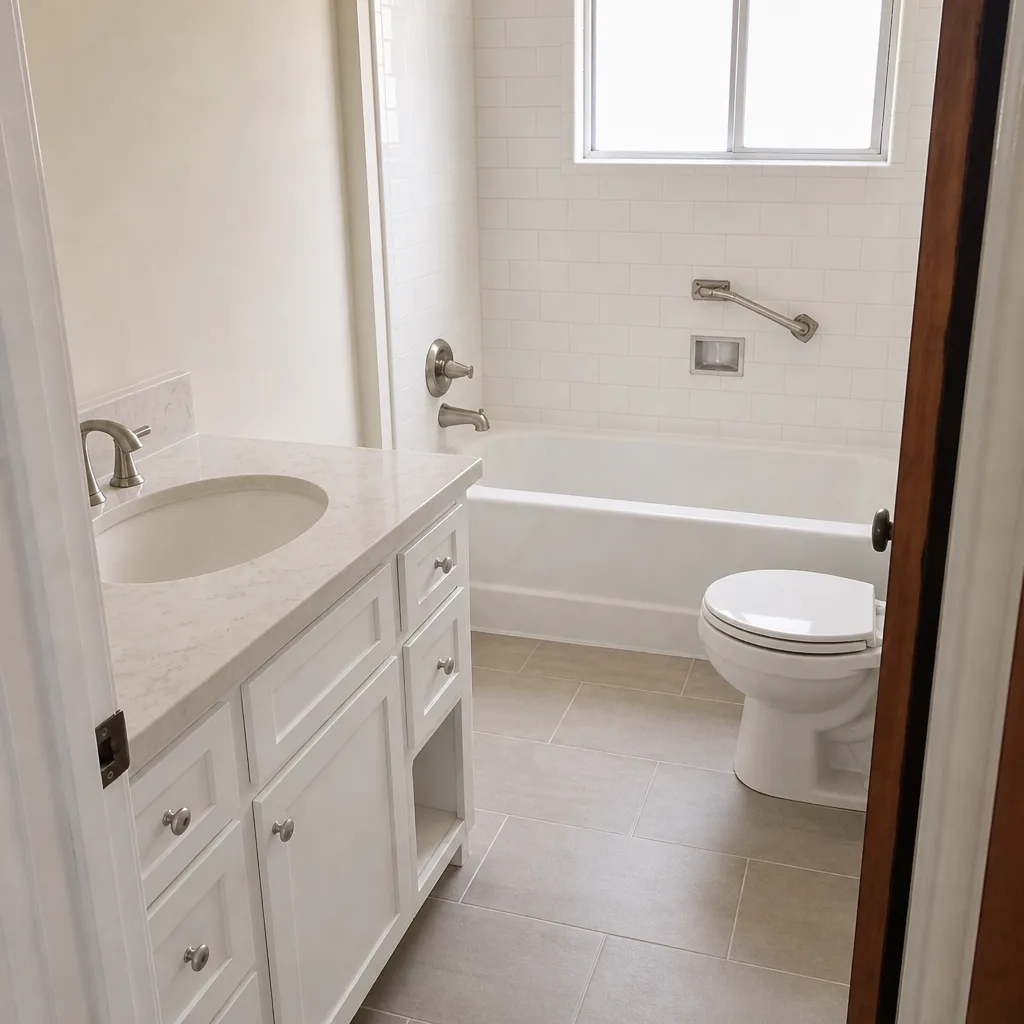 After
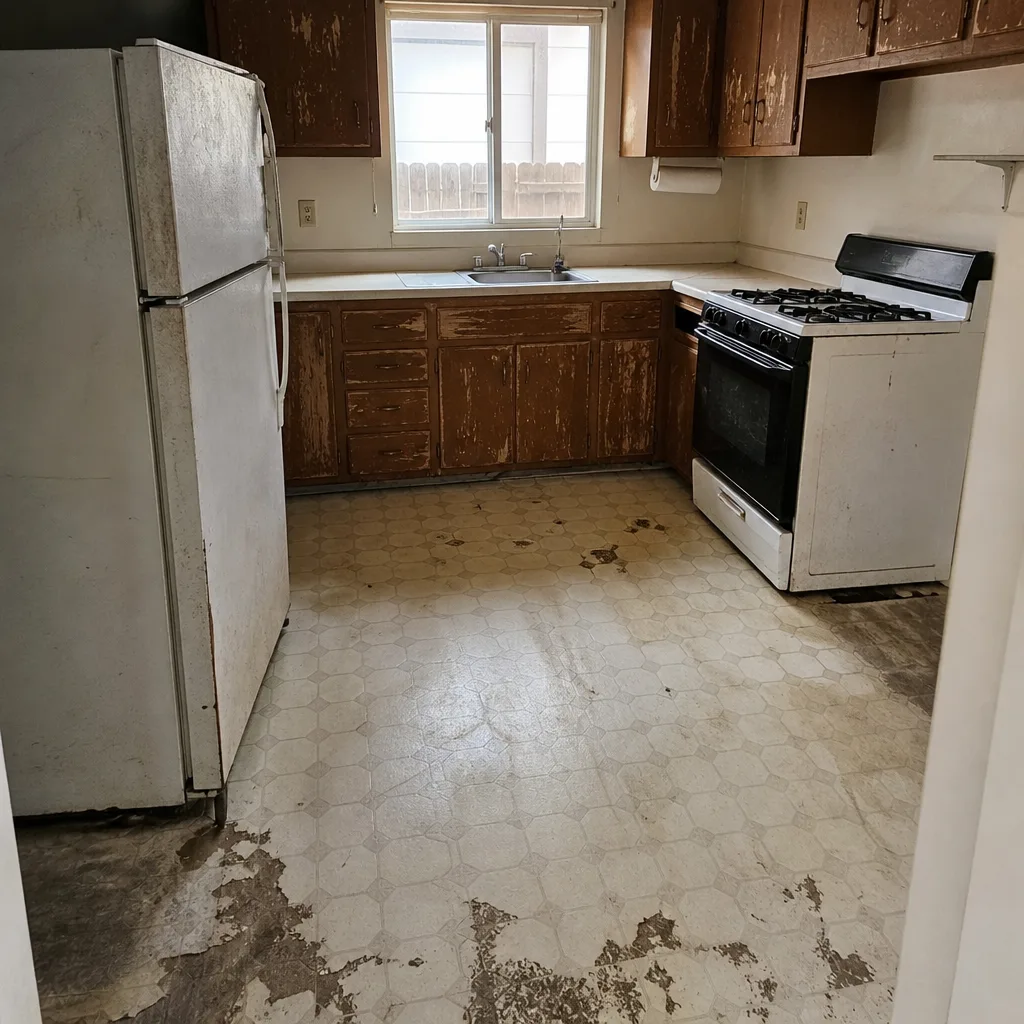 Before
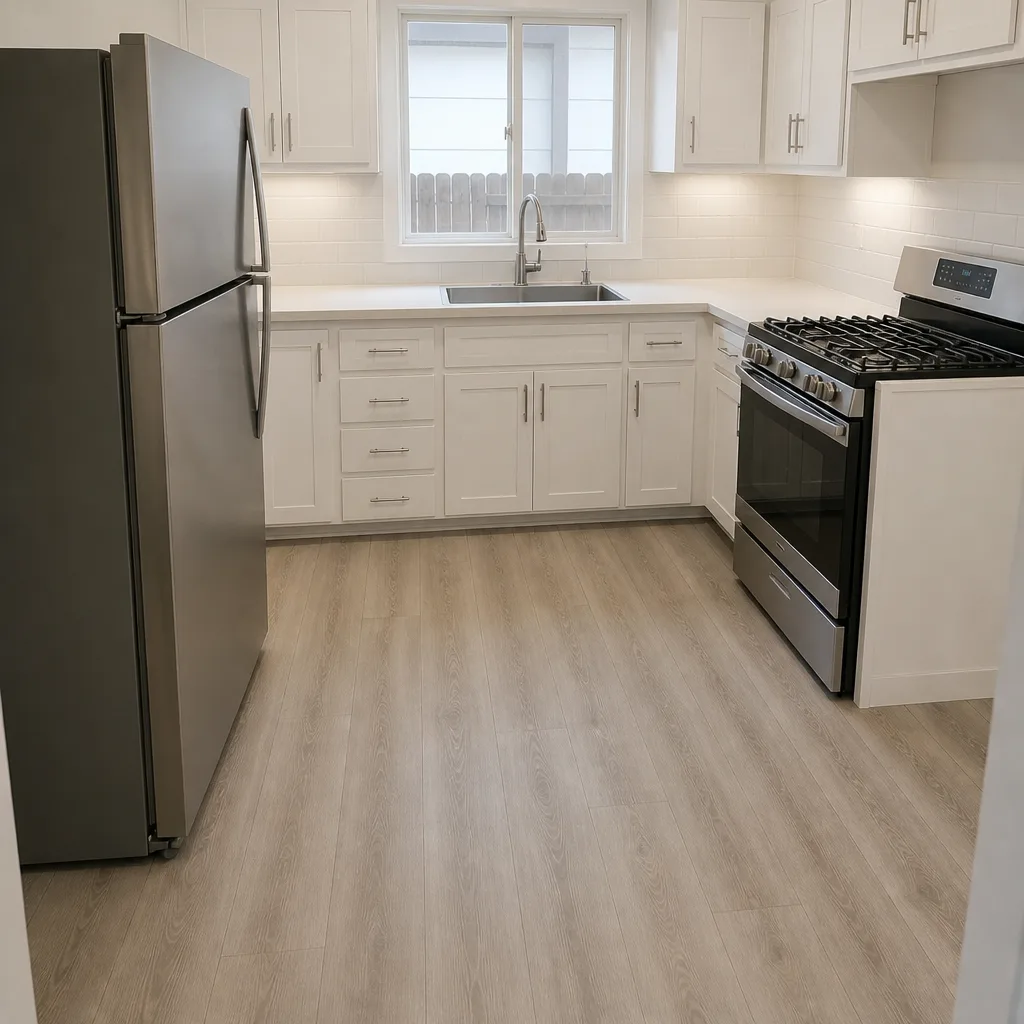 After
When to Call a Professional
Call for help on any of these: water on the finished floor that isn’t coming from a fixture (membrane failure), mold at any caulk line that has recurred after two re-caulks (membrane failure), a shower valve that loses hot water pressure over 30 seconds of running (angle stop or supply line), an exhaust fan that drips after a shower (duct slope or termination), a door that no longer closes after tile (floor height), or cracked grout appearing in one or more continuous lines (subfloor deflection). For all of these, the diagnostic step is the important one; the fix is usually less expensive if the diagnosis is right the first time.
Rowan Construction Group Santa Rosa offers free estimates in Santa Rosa – call (833) 842-1866 to schedule yours. Our technicians have up to 19 years of experience, the price is written before work starts, and every visit includes a documented photo record of what we found and what we did.
Frequently Asked Questions
Regrouting a cracked area runs $300 to $900 for a partial fix. If the crack follows a continuous line and points to subfloor deflection, the correct repair is more involved and typically starts with a deflection calculation to determine whether joist reinforcement is required, which can range from $1,200 to $3,500 depending on accessibility. Call (833) 842-1866 for a free written estimate on the diagnostic step before you commit to a repair.
The duct run is either sloped toward the fan instead of the exterior, or it terminates in the attic instead of through the roof or wall. Warm, moist air inside a cool duct condenses, and the moisture travels back down. The fix is rerouting the duct to a proper exterior termination, typically $200 to $600 depending on roofline access. Call (833) 842-1866 and we’ll inspect the duct run and give you a written price before any work.
In our experience, it’s almost always a failing angle stop valve or an undersized supply line, not the water heater. A 3/8-inch compression line feeding a modern 1/2-inch shower valve can’t deliver the full flow at pressure. A plumber pressure-tests at the valve inlet to confirm before touching the heater. The fix is typically $150 to $400 per valve. If your shower pressure dropped after a remodel, call (833) 842-1866 – the diagnostic visit is free and the written quote comes before any work.
Yes. Every bathroom remodel Rowan Construction Group handles in Santa Rosa includes permits pulled and inspections passed as part of the scope, not as an add-on. Rough framing, rough plumbing, rough electrical, and final inspections are scheduled and documented. If a contractor suggests skipping a rough inspection, that’s the wrong contractor. Call (833) 842-1866 and we’ll walk you through the inspection schedule for your specific project.
A full bath remodel takes four to eight weeks of working time, with short gaps for inspection sign-off between phases. The written price won’t change unless a genuinely pre-existing condition is discovered during demo (subfloor rot, notched joists, cast-iron drain failure). When that happens, you get a written change order with scope and price before work proceeds, signed by both parties, and no work begins on the change until you’ve signed it. Call (833) 842-1866 to get a flat-price quote in writing before any work starts.
Yes. Bring us any written estimate from another contractor for a bathroom remodel in Santa Rosa, and we’ll review it line by line at no charge. We look at what’s specified (membrane brand, tile lippage tolerance, rough plumbing scope, inspection handling) and flag anything padded or missing. It’s a standing offer, not a sales pitch. Call (833) 842-1866 and we’ll set a time to go through it.
The Bottom Line
Bathroom remodel problems split into two piles: those that were knowable before demo and those genuinely discovered mid-project. Cracked grout traces to subfloor movement; caulk-line mold traces to failed waterproofing behind the tile; low hot water pressure traces to angle stop valves, not the heater; condensation drips trace to a mis-sloped or terminated-inside-the-attic duct; a door that won’t close traces to a floor height change the scope should have anticipated. ANSI A108.02 sets the lippage tolerance at 1/32 inch for tiles under 15 inches, and the rough plumbing inspection is the one homeowners never think to check. The evidence that sorts workmanship from material from pre-existing is documentation: photos, measurements, a written change order with a flat price, and a signed inspection card. A contractor who produces that record is the one to hire.
Ready to schedule a diagnostic visit? Call (833) 842-1866 for a free estimate. Rowan Construction Group Santa Rosa delivers a written price before any work starts, a documented photo record on every visit, and the 365-Day Done Right Promise on every bathroom we touch.
Written by the team at Rowan Construction Group Santa Rosa.